kristinharrisdesign.com
Flip Boom Cartoon is a fantastic tool for teaching kids how to become animators. I recently spent a lot of time working with middle school students using this iPad tool to create short animations.
Question to Get Started
I like to start my animation workshops with a question. What does "to animate" mean?
What could be more exciting than "to bring to life"...everything from letters to balls and most importantly the students own artwork and stories.
The Interface
As you can see, it is intuitive and accessible. I ask the students to just play with the tools for a few minutes to practice/discover how they work.
The Timeline: An Important Concept to Understand
One of the challenges, even with middle school students, is helping them understand the concept of sequential imaging...making a series of still images when played in succession fast enough, appear to be moving. That's what animation is all about.
We spend time looking at the timeline or series of frames at the bottom of the interface and discussing what they represent and how to build a series of images on them that appear to move. We always look carefully at the bouncing ball sample Flip Boom provides.
A great feature of Flip Boom is the slider on the proofing page that allows the students to adjust the frame rate (how fast images are being shown) to see how fast is too fast and how slow is too slow.
Many students start to create project with complex images in each frame. When they are played in rapid succession, they don't work. At a slow speed, they are a slide show. Slide shows are fine, but not animation and not using FlipBoom Cartoon to its best advantage.
Now let's get started.
Sample Project #1
I have found that creating a sample project for them to mimic is a great way to get students started. As a general rule, I don't know the students and it's also a good way for me to learn something about them.
My sample project starts with adding words sequentially to identify myself (which they will do for themselves in their own projects). This reinforces the idea that all of the art/information needs to be added over a number of frames.
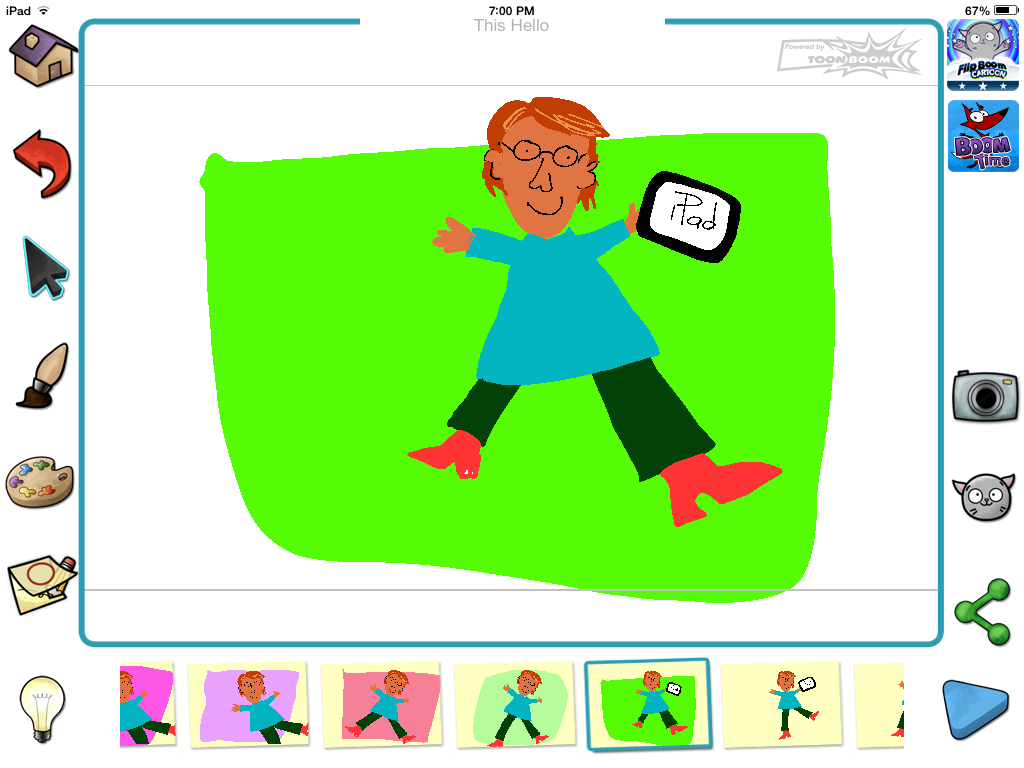
After I have built my name over a series of frames, I add an image of myself. I dance around a bit to add some humor to the process.
Step Three
Then I include images of something I like to do. In this case, it's work on an iPad. The iPad eventually enlarges and the animation appears in the iPad. This is also a way for the students to get to know me.
I don't expect the students to jump in with this complexity at the first pass, but they are very adept at adding images of singing, eating pizza, playing basketball and other things they love to do.
Step Four
When the students are at this stage of their projects, I can jump in and help them break down an image build to animate their activities. One student liked to sing. I helped her make her mouth change shape as she sang and we added a variety of musical notes to her animation. Another student played the drums. It was relatively easy for her to have her arms move up and down and strike the drum to animate her activity.
It is really fun and very gratifying to see the pride they take in their work.
Giving Students Choices within a Structure
This has been a successful first project for the middle school students I have worked with over the past year. Everyone likes to talk about themselves and hopefully it puts them at ease.
Here are links to a number of articles about those programs, some of which include animation and others include animation using other tools.
iPad Camp at Lynchburg College
A variety of examples of iPad Camp projects and animations
How are you helping budding animators?


No comments:
Post a Comment